Another iconic bakery recipe for Vegan Rainbow Cookies!
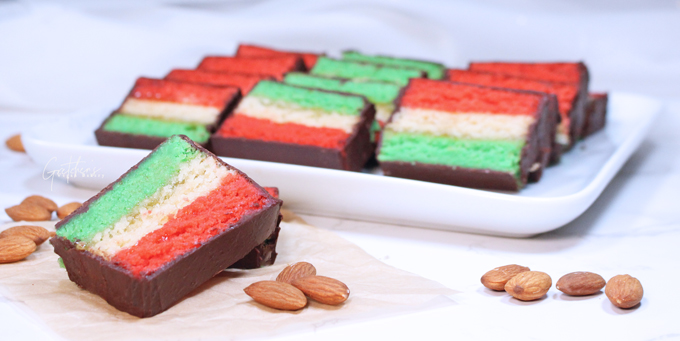
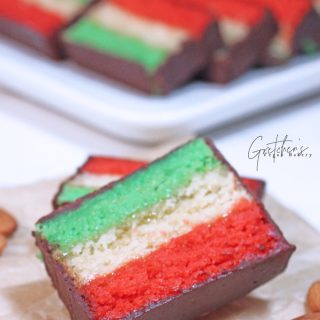
No Italian bakery is complete without an array of colorful rainbow cookies in the display case!
Although I’m not quite sure why they are called “rainbow cookies”
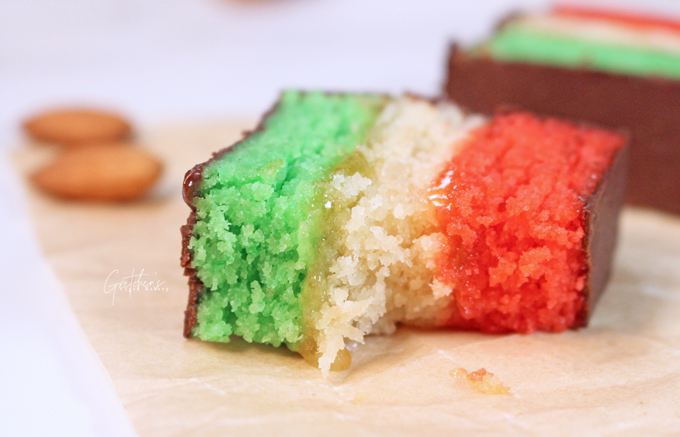
Since the colors are actually just red, green and white to match the colors of the Italian flag!
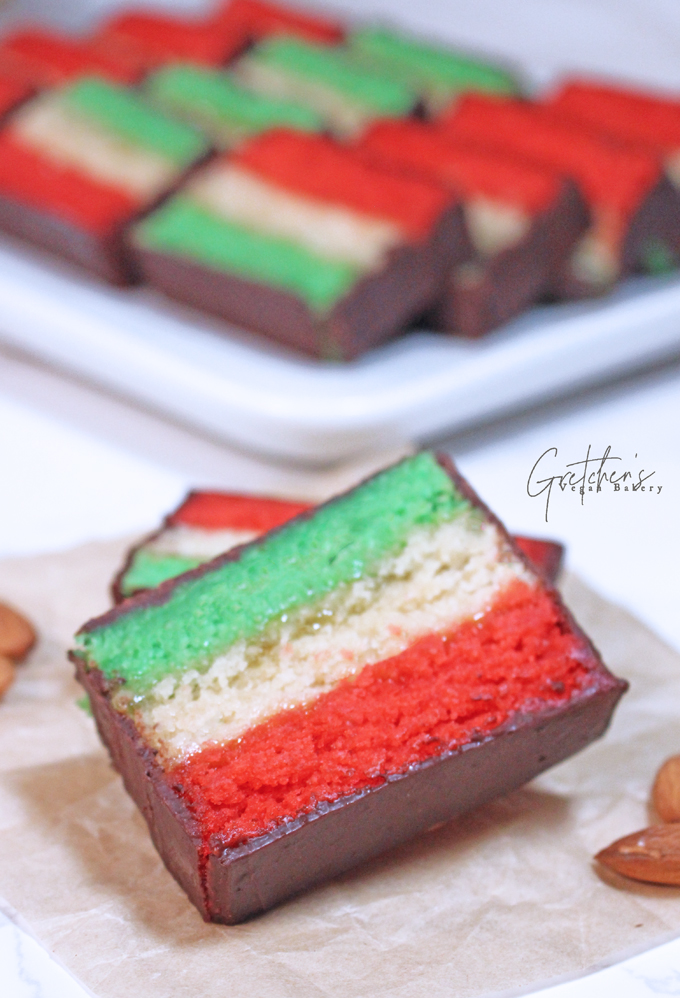
Petite squares of frangipane cake so delicate, each bite melts in your mouth!
Coated with that thin signature chocolate shell these cookies are worth the effort!
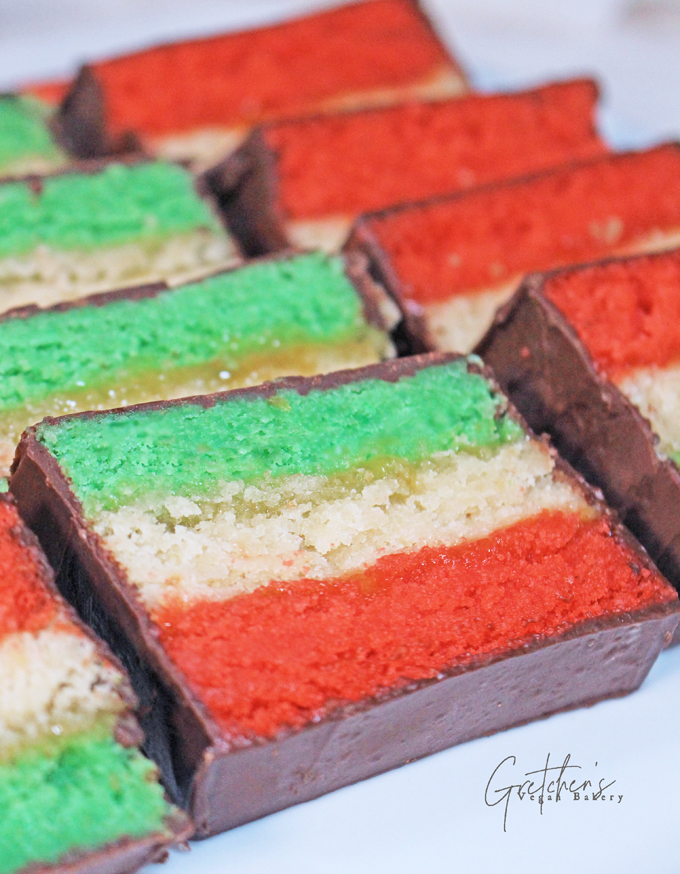
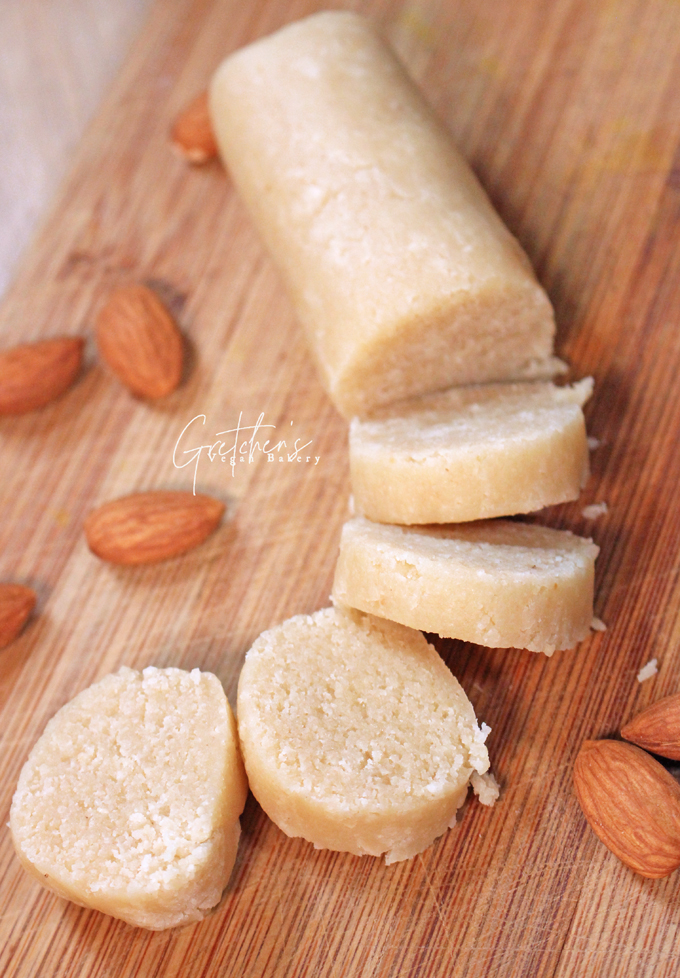
Homemade almond paste makes this recipe easy, accessible and addicting!
With minimal ingredients these soft almond layers bake up in no time!
No affiliation with any product or company linked below, solely for visual reference
Notes for Success:
Link for the 1/8 sheet pans here on Webstaurant Store but of course you can purchase them anywhere this is just for visual reference
These cookies can easily be converted to gluten free simply by using a 1:1 gluten free blend like bob’s red mill and a gluten free cornstarch
My homemade recipe for almond paste is much softer than some store brands
So if you are buying yours it may be necessary to soften it with a tablespoon or two of the aquafaba from the recipe before mixing in the rest of the ingredients
Apricot jam is my choice for the filling of these rainbow cookies but many people use raspberry jam instead, it is your option
I’ve used gel paste food color and since all food color brands are different start with one drop and continue from there until you reach the color you love
There are more natural food color powders but the colors will be more muted
In the video I mistakenly said that I colored one of the layers white. I did not do that
I just left the batter plain for the white layer which is technically more ivory.
Be sure to temper your chocolate since these cookies will be kept at room temperature and if your chocolate is out of temper it will not set properly
I have a step by step YouTube video for how to temper chocolate
WATCH THE VIDEO FOR HOW TO MAKE THESE RAINBOW COOKIES!
Vegan Rainbow Cookies
Ingredients
For the Frangipane layers:
- 1½ lb Almond Paste (680g)
- 9 Tbs Vegan Butter softened (126g)
- 6 Tbs Aquafaba (90ml)
- 3 Tbs Cornstarch (24g)
- 9 Tbs All Purpose Flour (70g)
- Baking Powder 1/4 tsp + 1/8tsp
For the Chocolate Coating:
- 8 ounces Vegan Chocolate (226g)
you will also need
- Vegan Food Color
Instructions
- Grease & parchment line 3- 1/8" sheet pans & preheat the oven to 350°F
- First prepare the almond paste (or use a good quality store brand) click through to that recipe to see how to make it!
- Combine the softened vegan butter & the almond paste in a large mixer bowl & cream until blended together on low to medium speed, stopping to scrape the bottom & sides of the bowl often
- Whisk together the cornstarch with the aquafaba then add this slowly into the creamed butter/ almond paste while continuing to mix on medium speed
- Scrape the bottom & sides of the bowl again to mix evenly then whip on high speed for about 5 seconds
- Add the flour & baking powder, mix to combine evenly
- Divide the batter evenly into 3 portions one will be colored red, one green & the other will stay plain white or ivory batter~ Since all food color brands are different start with one tiny drop & go from there
- Bake for 18-20 minutes or when the edges just start to get light golden brown~ check at 15 minutes since all ovens bake different~ you do not want to over bake these!
- Cool completely then turn out onto a parchment lined sheet pan & freeze to make it easier to assemble
- Spread 3 Tbs jam for the filling of each layer
- Trim the edges of the frangipane cake & then temper your chocolate
- Watch the video tutorial for how to easily coat each side of the frangipane cookie logs
Video
Notes
This is amazing! These were my favorite cookies when I was a kid, and I’ve never found a good vegan recipe for them. I just had a thought “I bet Gretchen knows how to make these — she’s from Jersey!” Lo and behold they’re the 3rd recipe down. Can’t wait to make these for my birthday!
YAY! LOL Great I hope you make them!
(PS- you can basically search a keyword for just about anything you are looking for in the search bar and if I have made it~ it will come up! But always email too if you need anything!)
I loooved Brooklyn bakery rainbow cookies long long ago pre-vegan have tried a couple vegan recipes but now I gotta try yours! Can’t get the pans though and am worried 8×8 pans will make then too thin/delicate! Should i try some crazy division of the 1/4 sheet pans I do have? Erect a barrier ti divide them in 2 somehow? I’m scared…
Yeah using a larger pan would not be a great idea since these layers are delicate already ~ but to construct the barrier…LOL You are right up my alley! I have done that in a pinch! Not the greatest but it works!!!
Ok I felt encouraged by your response and went for it. Used parchment paper to build a wall dividing a 1/4 sheet pain half for the green and wwhite layers and found an old 6×9 brownie pan for the red. I knew this wouldn’t be a runny batter and it worked out great! And man the recipe itself = delicious. Super easy to make the paste cause i had a big ol bag of almond flour at Costco and te larger quantity of almond made the texture and flavor spot on..found other recipes too cake-like. My big struggle turned out to be cutting the squares, I’m just not neat enough or something but zero regrets, you are a damn goddess THANK YOU
Awesome! I’m happy you went for it!
This is not a good vegan recipe! The almond paste to flour ratio is completely wrong. I followed the recipe and it was a total fail. Is there a typo in the recipe? Because compared to every other recipe out there that amount of almond paste is way to much with that little amount of flour.
Hi Jackie, I am sorry that happened! I will have to remake this recipe today to see if I made a typo. Thank you for letting me know.
Editing Update:: I just finished baking the recipe as it is written to make sure I did not make an error in the conversion when I wrote the recipe. It came out great for me. Again I am sorry that happened to you. I am not sure if you were able to watch the video tutorial that went along with the recipe, but sometimes it helps to have a visual real time representation of the recipe.
Do you know how much this recipe yields in weight in ounces/pounds?
By adding up all the ingredients weights it is about 990g which is just over 2lbs.
Could u make the copy cat Italian rainbow from chip ciy
Hi I do not know what that is
Hi Gretchen, you may convert me yet. Longtime follower of previous site here. My DIL’s favorite cookie is the Italian Rainbow. Every year I mail a batch for her birthday. Now the youngest is allergic to eggs and I thought it would be unfair to her to send a family sized batch if she couldn’t also enjoy them. I am so happy to find this recipe.
Hi Eileen! That’s great I am so happy to hear it!
Hi Gretchen! Tried your recipe this year for the first time, they are so moist and wonderful. I typically make these cookies for exchanges so I doubled your recipe so I would have a couple dozen to exchange. However, I had difficulty with two steps and was hoping you could provide some pointers. First, I had a difficult time spreading the batter in the pan; in your video you used an offset spatula. I used a bowl scraper (which I’ve used with previous recipes) but the batter stuck to it very badly. Do you think a metal tool sticks less? Second, I had a very difficult time stacking the cookies (one layer broke on the flip, another was horribly misaligned and because they’re so moist I was unable to move them over). How would you suggest supporting a larger sheet (1/4) while flipping for volume baking these?
Thanks again for posting!
Hey there! I am happy you tried my recipe & love the taste! I have always used offset spatulas to spread any batter it’s just easier to move it around and the offset accounts for the rim of them pan allowing it to be spread completely even
As for the flipping & avoiding cracking, yes this is tricky! We made FULL SHEETS in my bakery & this was always the hardest part
However I would always assemble when the cake layers were completely frozen (frozen IN THE PANS)
The trick is to #1 work fast #2 keep them IN the pan and flip them onto the layers then you can pry off the pan and add the jam, then add the next frozen layer
It takes practice & finesse and even in the bakery sometimes a layer would mess up (crack or go on slightly crooked)
hi, I don’t see info on how much food coloring / spirulina or beet powder, or how to integrate these….
Hi Lisa thanks for pointing out that this step may be confusing as I did not specify exactly how much color I used in each one.
I think because food color is so different across the board & I assumed folks would color to their liking. I will definitely update this post with a note about that!
Same goes for the natural food colors like Spirulina & Beet Root- as these variations will not give off vibrant colors & using too much will throw off the balance of the recipe
hey thank you for your reply. If using spirulina and beet powders, how do you recommend incorporating those / how much of those would you use? Would you have to ‘rehydrate’ the powder first? thanks.
Since this frangipane is a wet batter i wouldn’t see a need to reconstitute the powders
Just add 1 teaspoon at a time of each until you get the desired color *paying attention to the texture of the batter though~ adding too much will tighten the cake too much resulting in a dry outcome, so you will definitely not get the vibrant colors as using food coloring, but that’s always going to be the tradeoff when using more natural colors