Poaching pears in a seductive liquid made from cherry juice, cinnamon, anise and white wine!
Stunning and sophisticated and easy and delicious!
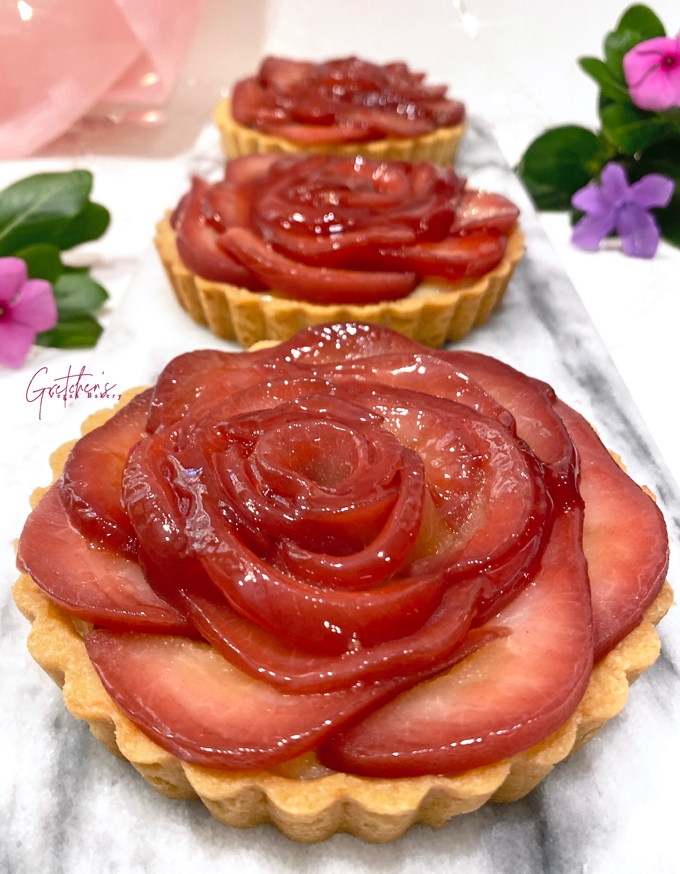
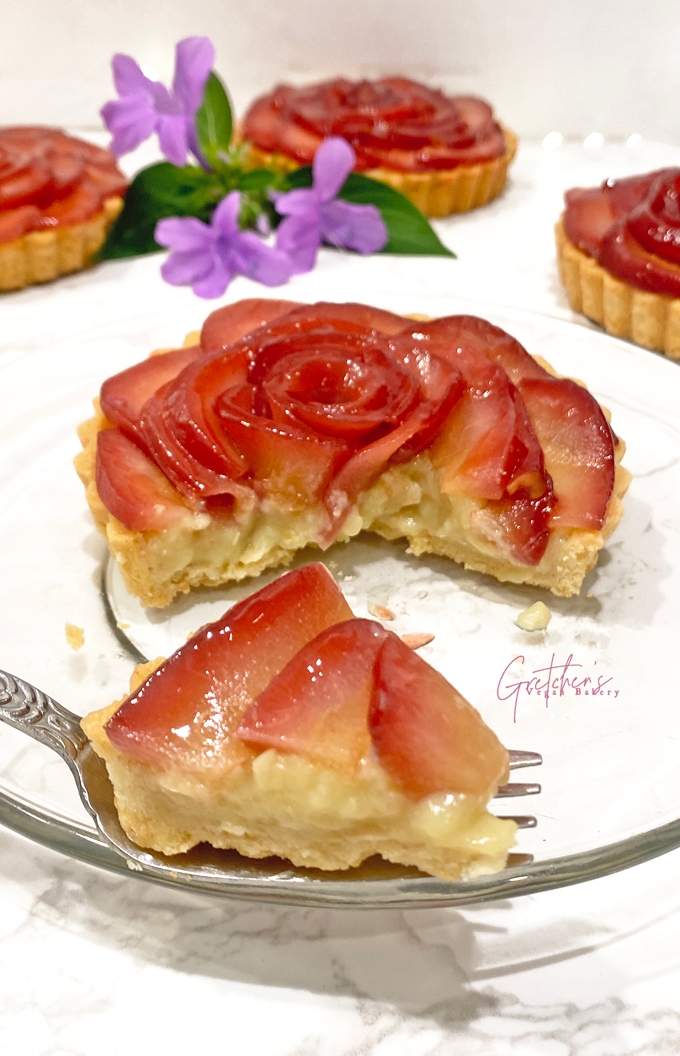
Vanilla Custard, rose scented tart crust and beautiful sliced pears for a stunning and unforgettable dessert
It smells like Christmas and looks like a wedding!
No affiliation with any product or company linked below, solely for visual reference
Notes for Success
Adding a small amount of Rose Extract to the cookie dough recipe in place of the lemon extract (*I still used the zest though!)
Really adds a complex layer of flavor but be aware that too much can make it taste & smell like perfume!
So ½ teaspoon to the entire recipe is more than enough! Or leave it out & follow the original flavor profile
Easily convert this recipe to Gluten Free by using your favorite Gluten Free Cookie Dough Recipe for the tart shell!
Additionally this entire dessert can become a low sugar option simply by using your favorite sugar substitute in the custard!
Monk fruit sugar is always my #1 choice and I use it in exact proportions to the sugar listed below!
Click here for more information about Sugar Free Baking!
This recipe will make 6 individual 4″ tarts or 1- 9″ Family Style Tart
Cranberry or Cherry Juice can be used interchangeably for the poaching liquid both work great for that vibrant color!|
I will say I think I prefer cranberry since it is less sweet than cherry so just be aware of that and adjust the sugar to compensate
White wine can be substituted with a non alcoholic sparkling wine or even just water or more juice
You will need approximately 8-9 small pears total (1½ small pears per individual tart)
Medium or Larger pears obviously you will need less, but it is always a good idea to make more than you think you need so you don’t run out!
Three easy recipes to make this stunning tart!
Poached Pears could be (and probably should be) made up to one week in advance
the color will intensify and the taste will be out of this world!
The cookie dough and tart shells can also be made well in advance and kept in the freezer until you are ready!
Quick stove top custard is ready in minutes!
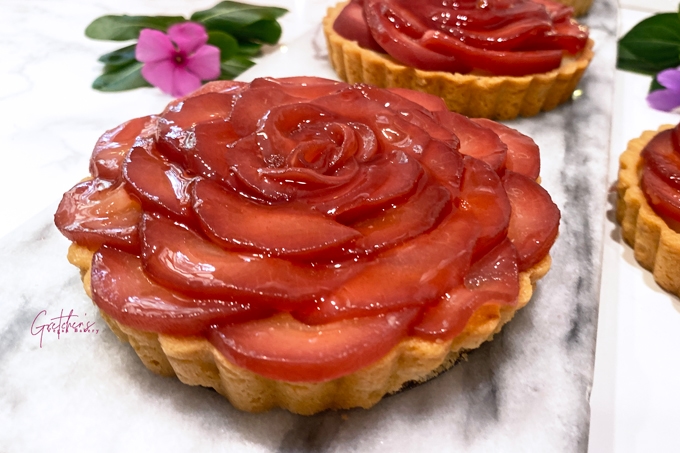
Poached Pear Tart
Ingredients
For the Poached Pears
- 9 Small Pears
- 1½ cup Cherry or Cranberry Juice (355ml)
- 1 cup White Wine (237ml)
- ½ cup Water (120ml)
- ½ cup Sugar (100g)
- 1 Vanilla Bean Pod
- 2 Cinnamon Sticks
- 6 Allspice Berries
- 8 Whole Cloves
- 4 Anise Pods
For the Tart Shells
- 1 Recipe Sugar Cookie Dough
- ½ teaspoon Rose Extract *see notes
For the Vanilla Custard
- 2¼ cup Plant Milk (533ml)
- ¾ cup Sugar (150g)
- 5 Tbs Cornstarch *see notes (40g)
- pinch tumeric *optional for color
- 1 teaspoon Vanilla Extract (5ml)
Instructions
- First prepare the poached pear by peeling the pears. Coring them ahead of time is your option but I usually leave them intact for poaching then cor them later
- Combine the juice, water, wine & all the spices in a large sauce pot. If using a vanilla bean split it & scrape the seeds into the liquid & add the scraped pod as well. Add the pears & cook over medium heat until the liquid is just about to boil then reduce the heat to a very low simmer & cook for approximately 45 minutes or when the pears are tender when poked with a skewer
- Meanwhile make the cookie dough according to the recipe on that post & add the optional rose extract in place of the lemon extract *I still do use the lemon zest though
- Once the cookie dough has chilled & the pears are cooked through roll the dough to ¼" thickness & line your tart mold(s)Freeze the shells while you preheat the oven to 350℉ & then bake them for approximately 5-18 minutes or when they are golden brown & thoroughly baked
- Meanwhile drain the pears & core them (if you have not already) by slicing them in half & then slice each half into very thin slices. Reserve them on a plate or on a sheet pan in the refrigerator while you make the custard
- In a medium sauce pot combine the sugar with the cornstarch & optional tumeric then add the plant milk & cook over medium to high heat whisking constantly to avoid scorching the bottom
- Once the custard starts to bubble gently remove from the heat & add the vanilla extract
- Pour the hot custard directly into the baked tart shells & refrigerate to set to cold & firm
- Arrange the pear slices on top of the custard tart shells in a rose pattern then brush with melted hot jelly *see notes
Notes
Leave a Reply