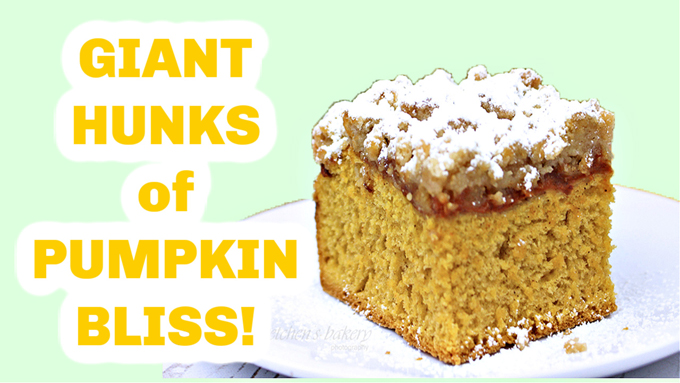
Pumpkin Coffeecake Buns are here to warm up your fall breakfast table!

The crumb bun is a classic New Jersey staple and happened to be one of the best sellers when I owned my bakery
Today I’ve loaded it up with pumpkin and all the fall spices!
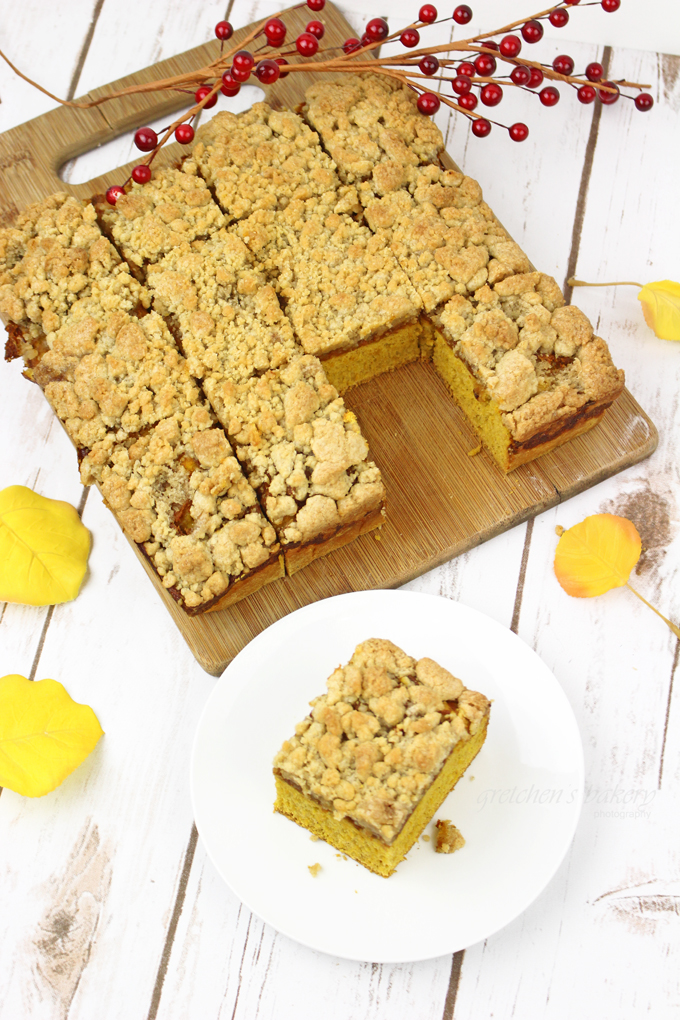
Light and airy pumpkin buns are not to be confused with crumb cake or coffeecake.
Not that there’s anything wrong with crumb cake or coffee cake, but this is not a cake!
It’s a yeast bun, similar to a cinnamon bun dough but baked in a pan, layered with pumpkin filling and piled high with crunchy, buttery, streusel topping!
Making yeast dough can be intimidating to some people.
But don’t be put off because it really is a simple recipe to make
So be sure to watch the YouTube video tutorial for how I make this recipe from start to finish!
WATCH HOW TO MAKE THESE PUMPKIN COFFEECAKE BUNS!
 ‘
‘
Notes for Success:
For those who don’t have pumpkin pie spice on hand for the dough portion of the recipe
You can use a combination of cinnamon ½ tsp, nutmeg ¼ tsp, cloves 1/8tsp & ginger ¼ tsp
Solid pumpkin in a can is a staple here in the USA but I have been told this is hard to come by in other countries.
In which case you can always make your own homemade pumpkin puree with my recipe and step by step tutorial here!
Pumpkin Coffeecake Buns
Ingredients
For the Bun Dough
- 14 Tbs Plant Milk 207ml
- ¼ cup Softened Vegan Butter 60ml
- ½ cup Granulated Sugar 100g
- 1 teaspoon Dry Yeast
- ½ cup Canned Pumpkin 110g
- 3 cup All Purpose Flour 375g
- 2 teaspoon Pumpkin Pie Spice
- ½ teaspoon Salt
For the Streusel Topping
- ⅓ cup Light Brown Sugar 70g
- ½ cup Granulated Sugar 100g
- ½ teaspoon Salt 3g
- ½ teaspoon Ground Cinnamon
- 10 Tbs Vegan Butter 140g
- 1½ cup Cake Flour + 2 Tbs 195g
For the Pumpkin Layer
- 1 cup Solid Pumpkin 226g
- ½ cup Light Brown Sugar 100g
- ½ teaspoon Cinnamon
- ¼ teaspoon Nutmeg
- ½ teaspoon Ginger
- ⅙ teaspoon Ground Clove
Instructions
- First prepare the bun dough by combining the yeast & warm milk with a pinch of sugar After 5 minutes it should be frothy to prove that it is working, so you can proceed to mix the recipe
- Combine all of the ingredients including the yeast milk into the work bowl of your stand mixer with the dough hook attachment & mix for 2 minutes on low speed. Stop the mixer to scrape the bottom & sides of the bowl to help the dough incorporate evenly.
- If the dough looks particularly sticky (meaning it won't gather up from the bowl to form a dough) you can add another tablespoon or 2 of flour
- Mix for another 5 minutes then turn the dough out onto a generously floured surface & knead for 30-40 strokes until it forms a smooth ball of dough, adding flour if necessary but do not add too much or you will have a very stiff dough.
- Place dough in a lightly oiled bowl cover & allow to rest for about 1 hour at room temperature.
- Prepare the pumpkin layer by combining all the pumpkin filling ingredients together in a bowl, reserve.
- Next prepare the streusel topping by creaming the cold butter with both sugars - about 2 minutes.
- Add the cinnamon, salt & flour and mix just until combined and keep in the freezer until needed.
- After 1 hour of resting the dough, begin preheating your oven to 375° F. (I also like to use a pizza stone for baking crumb buns, if you have one, Great! Use it!)
- Remove the dough from the oiled bowl onto a lightly floured work surface and gently press the dough to release the gasses roll into a rectangle shape the size of your greased pan - I am using a 9" x 13" pan (no parchment paper)
- Dock the dough with a fork to allow steam to escape while baking
- Spread with the pumpkin filling
- Cover the entire bun with streusel topping but do not use too much pressure to push the streusel into the pan, but rather use a fluffing motion & gently toss the streusel around on top of the dough covering the entire dough
- Bake on the center rack in on the pizza stone in a preheated 375°F oven for 30 minutes, then turn the oven down to 325°F take it off the pizza stone (just by moving it to another rack) and bake for another 15-20 minutes or until the streusel is no longer doughy. (You can check this simply by moving a larger piece of streusel to the side with a fork or spatula to see if the center is still raw)
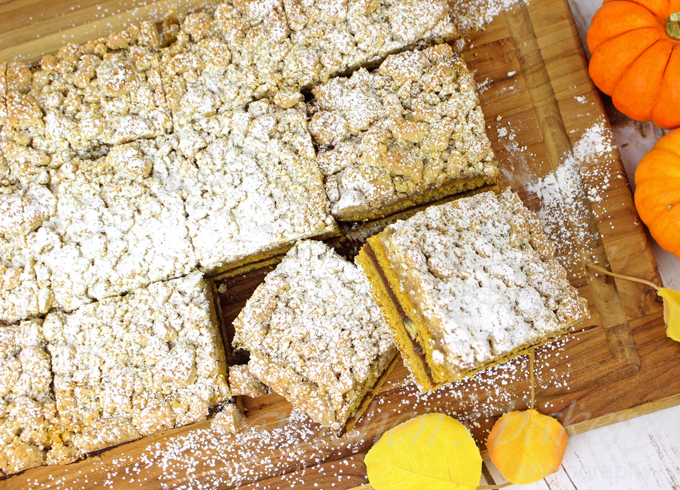
- Cool to warm before serving, cut into desired portions & sprinkle powdered sugar over the top of the buns.
I plan on making these on today. I will review when done. However, I was wondering if you have ever tried a mixer called Ankarsrum Assistent Original AKM 6230 Electric Stand Mixer, 7.4 Quart (Red)? I have never seen you use one but wasn’t sure if you have ever used one in your training or had any thoughts about this brand. Or if you have thoughts of why the Kitchenaid is a better brand. Thank you for all your amazing recipes!
Hi Heather sorry for the late reply I have not been getting notifications to alert me to new comments!
I have not tried this brand mixer you speak of, actually I have not used any other than Kitchen aid! So I would probably not be the one to ask about comparison pros & cons!
However I can say the fact that I have never needed or wanted a different brand speaks pretty highly of KA!
Hi, I just made this recipe. It seems to have two variations. The recipe and a couple photos describe that the entire dough is rolled out and placed in one layer, topped with pumpkin filling and then crumb topping. The video demonstrates a variation where the dough is rolled out, cut in half, one half placed in pan, pumpkin filling on top, the other piece of the dough on top, with the crumb topping on that second piece of dough. I followed the variation (in the video) with the dough in two pieces. I can say that if I were to make this recipe again, I’d try the single-layer-of-dough version which the recipe describes because the bottom layer of dough absorbs that pumpkin filling too much and doesn’t rise and becomes chewy and hard to eat. At our house, the pumpkin filling itself was a hit, likewise the crumb topping. But the dough base, divided in two, didn’t make a good experience (by the way, I did use a pizza stone as advised). What I’m going to keep from this recipe is the pumpkin filling–would be terrific with a few pureed dates added to use in a date bar recipe instead of the dates. Also, definitely, the crumb topping. I watched an America’s Test Kitchen video for New Jersey crumb buns and even though they used the same ingredients, including cake flour, for the crumb topping, theirs used melted butter and was gloppy looking and needed to be crumbled by hand. Gretchen’s crumb topping, however, calls for creaming cold vegan butter with the sugar, and then adding the remaining ingredients. Wow, I beat it with a hand held mixer and it just created fluffy crumb shapes quickly. I put then on a quarter sheet pan and stuck them uncovered in the freezer. When frozen I put them into a bag and sealed them, putting them back in the freezer. All they needed was to be sprinkled on top. So different from the arduous process the ATK gals had to go through, touching and twisting every piece of crumb. (The ATK gals did mention that it’s important to use cake flour and not all-purpose flour for the crumbs because AP flour would make them too hard. That’s why Gretchen uses them in her recipe as well.) Two more points: first, this recipe for a Sunday morning requires making all the separate parts the night before: to serve by 9 a.m. the dough needs to be pulled out of the fridge at 5:15 am and allowed to come to room temp for 2 hours before rolling out (I just went back to sleep for another 2 hours). Second, if you’re a fan of traditional coffee cake, I’d say it would be worth it to use your favorite coffee cake base for this recipe with a layer of some of the pumpkin filling in the center and then the crumb topping on top.
Thank you for this lengthy, precise & well thought out explanation for others who may want to attempt this recipe!