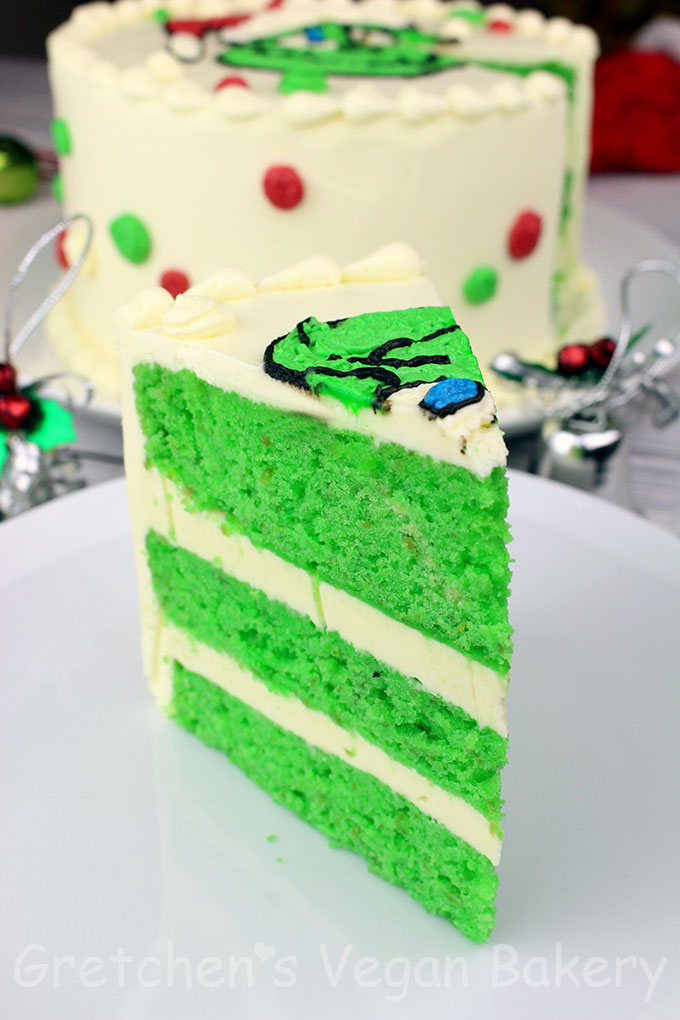
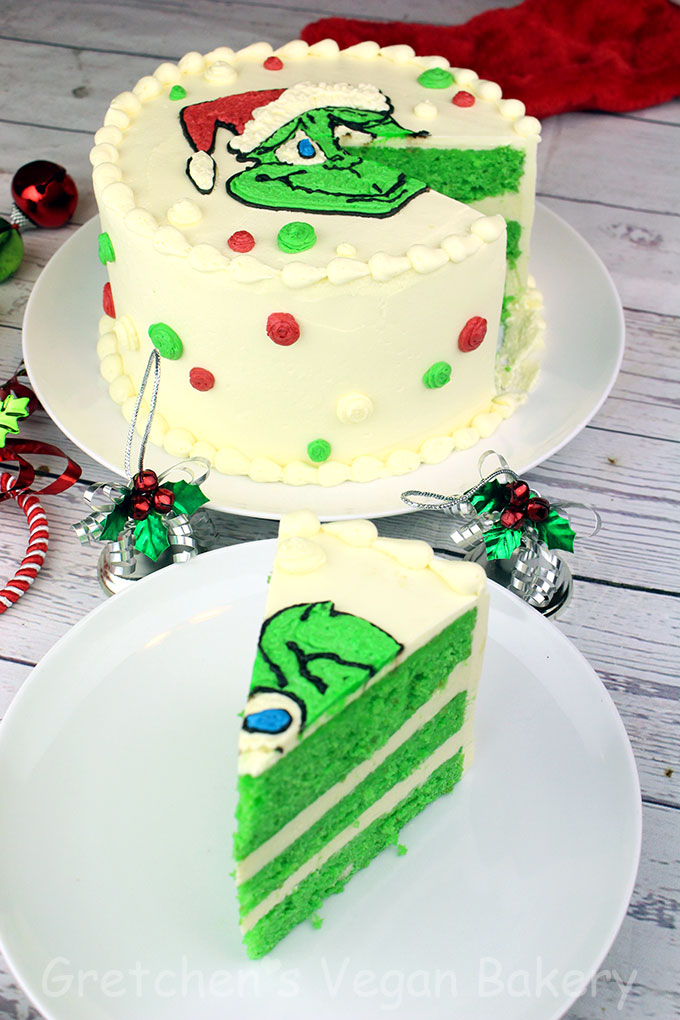
Simple Vegan Grinch Cake for Christmas
No special tools and only two recipes!
Even the most non artistic of you can pull this off I promise!

No airbrushing, no fondant and certainly no edible images to make this very simple Vegan Grinch Cake!
All you need is your favorite recipe for cake and buttercream and some parchment paper cones to decorate the whole thing.
The Grinch is hands down my all time favorite Christmas character.
The picture I chose of him for my cake is not a mean Grinchy picture but rather when he realized that
“Maybe Christmas, he thought, doesn’t come from a store. Maybe Christmas, perhaps, means a little bit more.”
This website may contain links as part of the Amazon Affiliate program, which means when you click a link and make a purchase through my website I may earn a small commission at no additional cost to you
Notes for Success & Tools I Used:
My fluffy vanilla cake recipe tinted green and American style buttercream is what I chose for this cake
But of course you can use whatever recipes you love the most
The recipe below is worked out for a 7″ – 3 layer cake
CLICK HERE FOR THE YOUTUBE VIDEO TUTORIAL FOR HOW TO MAKE THIS CAKE

Grinch Cake
Instructions
- For the cake:
- Grease and parchment line the cake pans and preheat the oven to 350°F
- Combine the flax meal with the hot water and let stand for about 5 minutes to thicken
- Add the vinegar to the soy milk to sour
- Sift the flour with the baking powder and salt
- Cream the vegan butter with the sugar until light and fluffy and this may take about 3-5 minutes on medium to high speed
- Add the thickened flax paste while mixing on medium speed, scrape the bottom and sides of the bowl to incorporate evenly, add the vanilla extract
- Add about 1/3 of the flour to the creamed mixture then add half of the soured milk
- Add another 1/3 of the flour and then the remaining sour milk
- Add the last amount of flour and mix just to combine evenly.
- Divide the batter evenly into the 3 greased and parchment lined cake pans and bake in a preheated oven for 25-30 minutes or until springy to the touch when you gently press the centers
- Prepare the buttercream recipe according to the instructions on that recipe post and then divide it into 4 small bowls for the color decor
- Assemble the cake & decorate as shown in the video tutorial
Notes
This cake can be stored at room temperature for up to 3 days, for longer storage refrigerate for up to 1 week
Excellent tutorial. Thank you for sharing your decorating tips.
That was awesome it looks delicious and who doesn’t love The Grinch. Very helpful Thank you for sharing 😀😁
Nobody likes the grinch he is a cold hearted man ok, but i guess some people like the grinch😒
Just kidding, everybody loves the grinch🥰
I would definitely buy this Grinch cake if I saw it in a window bakery for Christmas, I can already see my children and guest glaring the the cake. It’s just a very festive cake decor. Thanks
Hi Gretchen
what a cute cake for Xmass!
I BELIEVE I CAN SUB REGULAR BUTTER ETC. FOR A NON VEGAN CAKE ?
When the kids were little, I made so many character cakes for birthdays using this method. Works like a charm. Now that cascading dots are in favor, I pre-mark them as well so they line up the way you want them too. Great clips really enjoyed it.
Thanks Dan!
This is a great tutorial! I’m going to try this with family. Thanks so much!!
What a beautiful cake. I’m making this for a Christmas potluck at my work. To make sure I do it right, I started with a practice cake first. And it turned out even more delicious than I expected! One note: I couldn’t find a good picture like yours, so I took yours and expanded it… Which did work with some minor corrections to the perspective. But if you happen to have a source, that would help others I’m sure.. Anyway, thanks for the detailed instructions and inspirational cake idea! Yes, I know it’s a little odd to call a Grinch cake ‘inspirational’, but it is! ?
LOL! Thanks for the feedback and I’m so happy you tried it! and with success! YAY YOU! I just did a google search for ‘The Grinch” and hit IMAGES there were tons to choose from!
I love the look of this cake! My 4 year old is requesting it for his bday in March. I was wondering if the icing is really sweet & how you get such a nice red icing without putting too much food coloring in so that it doesn’t change the taste? Thanks in advance for your help!!
Hi Thanks! AS for the icing “really sweet” is a matter of opinion. It is sweet yes, like most buttercreams will be. So it’s hard to say whether you will think it is or not. Most people LOVE this recipe, it’s easy and delicious. SO I guess I’d say try a small recipe to see if you like it. I do have more recipes for icing CLICK HERE (but this one takes color the best that leads to your second question. I use Chefmaster colors, I find it is best to color the day before decorating since the colors will darken as they sit and you can use less that way. I have never found an “off” taste from colored icing, again this could be more sensitive from person to person though
Thank you very much for your reply!
What shortening do you recommend?
I was using Hi Ratio (like Sweetex) when I could find it, but that is a rare occurrence as of late. I do not like Spectrum as it is way too soft, and the point of shortening in the first place is to keep it stable and pipe-able.
That said I have resorted back to Crisco with a larger amount of vegan butter (so like 2/3 vegan butter: 1/3 crisco) you can also use all vegan butter
This is awesome making this for my kid this Christmas thank you for recipe
Can I use almond milk instead of the soymilk?
Im sorry for the late reply! I have not had internet connection for the last 4 days!!
BUT YES to your question!
My name is shameeka Townsend and i am at the Athens middle school. It’s where i go to school, i am in the sixth grade. So i am doing a a class assignment and we have to find a Christmas recipe that we tried before and i was wondering if i could change it a little because for the assignment i have to have at least 5 ingredients and 1 whole number, 1 fraction, and 1 mixed number is that okay. I was just asking like can you tell me the ingredients so that i have what i need for the assignment
It’s me shameeka again, I actually tried making the cake with my mom last night and it was a lot to do but it was pretty good. Good job and keep up the good work with your recipes.
Excellent! Thanks for the comment!
Your welcome
My name is supposed to be shameeka townsend
I have a question
If you had to make a New Years cake what would it be